Turok 1 EX Tools Turok 2 EX Tools Turok 3 EX Tools PO'ed EX Tools Shadow Man EX Tools Documentation

Shadow Man EX Tools v2.1.3 Documentation

By BehemothProgrammer

Level Overview


Toolbar Header

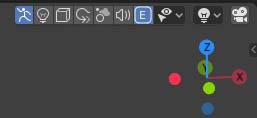
Once you've imported a level in Blender you'll see at the top of the 3D Viewport Header a bunch of icons for setting object visibility and other options.

From Left to Right:

  • (Stick Man Icon) Toggles Actor Visibility
  • (Light Icon) Toggles Light Visibility
  • (Box Icon) Toggles Detect Box Visibility.
  • (Path Arrow Icon) Toggles Path Node Visibility
  • (Cloud Icon) Toggles boxes for the PVS for the Sky
  • (Sound Icon) Toggles the sound objects Visibility
  • (E Icon) Toggles Event Visibility
  • (Eye Cursor Icon) Shows options for sector visibility to show only a certain sector instead of all of them at once.
  • (Light Bulb Icon) Shows options for baking lights into the sectors vertex colors.
  • (Camera Icon) Will create a Blender Camera object at the position of the active object.

Additional info about editing multiple objects at once

If you see this icon next to a property it means that when you set the property all selected objects will automatically have there property set to the same value as well. And right clicking and selecting 'Copy to Selected' will do nothing. In order to set other properties for all selected objects you must do it the normal Blender way of right clicking on the property and selecting ''Copy to Selected'

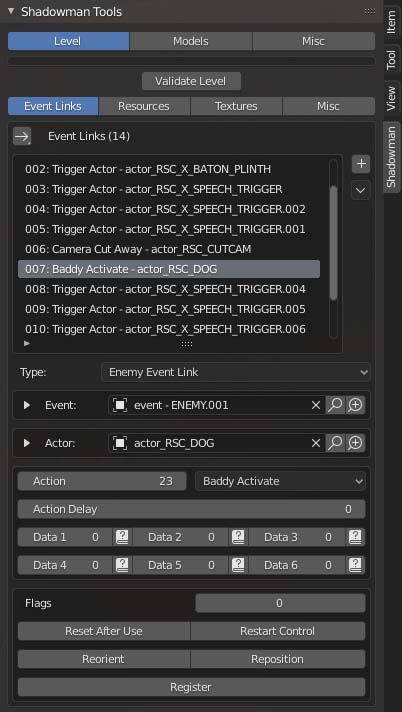
To edit Event Links open the Shadow Man Tool Panel by pressing N in any 3DView. Then Select an event link or add one using the + icon button on the right.

  • (Arrow Icon in top left) Find Next Event Link: Selects the next event link in the list that has the selected object linked to it. Use this often to find/cycle through event links in the list.
  • Event: You must target a certain event that this event link is connected to.
  • Actor: The target actor that this event link will effect.
  • Action: What action to Perform. Labels are mostly self explanatory.
  • Data Fields: Are specific to the Action. click the ? Book Icon for help about the fields.
  • Flags:
    • Reset After Use: Event Link can be retriggered.
    • Restart Control: Resumes control back to the player.
    • Reorient: Not used
    • Reposition: Not used
    • Register: Saves the state of the link so it won't be triggered again

items.txt (Custom Level Actors)

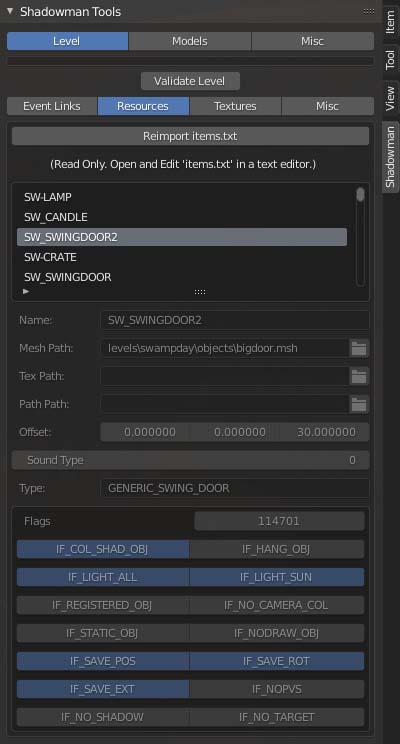
To view currently loaded Resources open the Shadow Man Tool Panel by pressing N in any 3DView. Then select the Resources Tab. Here you can view all the custom actors for this level which was imported from the items.txt file. Edit the levels items.txt to edit these and you can reimport them into the level after you make changes to the items.txt by clicking the "Reimport items.txt" button.

Documentation for items.txt


Texture Properties

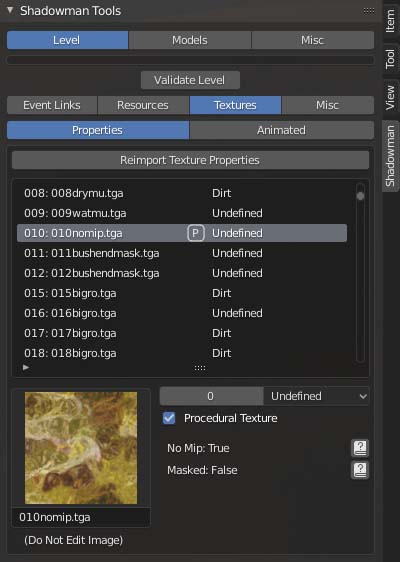
To view the levels texture properties open the Shadow Man Tool Panel by pressing N in any 3DView.
Then select the Textures > Properties Tab. Here you can edit a textures material type and check if it's a procedural texture like water. Procedural textures must be 128x128.


Animated Textures

To view the levels animated textures open the Shadow Man Tool Panel by pressing N in any 3DView.
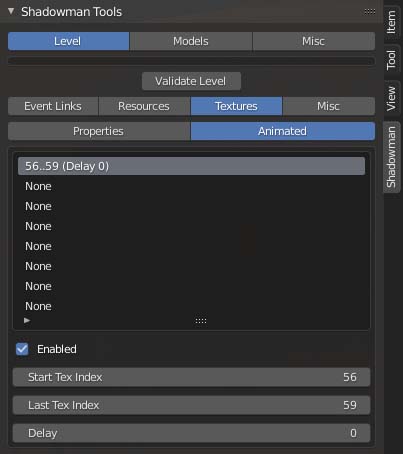
Then select the Textures > Animated Tab. Here you can only have up to 8 textures that animate. Select a slot and edit it.

  • Enabled: Make this slot active.
  • Start Tex Index: The texture index the animation will start at.
  • Last Tex Index: The last texture before it loops back to start texture index.
  • Delay: The number of ticks each texture frame is shown. Values that are <= 0 is the same as setting this to 2
  • Mode: Unused

Actors

When you select an actor you may see green colored lines connecting to an Event object indicating it is linked to one another. As well you may see cyan colored lines connecting to Path Nodes that the actor Baddy is using if any.

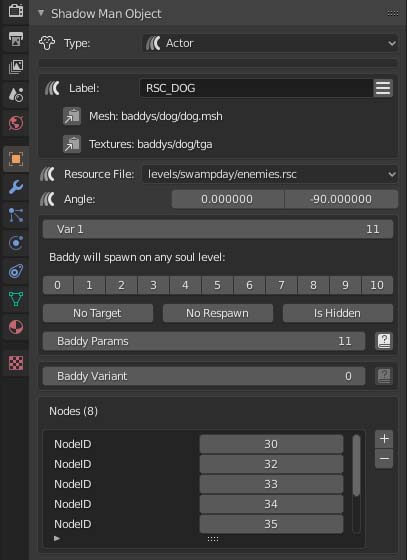
  • Label: The resource name ID of the actor. Click the menu icon on the right to search.
  • Resource File: The .rsc file this actor will be saved too.
  • Angle: The rotation of this actor. Important that you change these angle values instead of using Blenders Rotation.
  • Var1 and Var2: All actor have 2 int32 variables that will be used differently depending on the Actor. Hover over fields for tooltips and click the ? Book Icon for help about the fields.
  • Nodes: A list of Path Nodes that the Actor will use (For Baddys only).

Lights

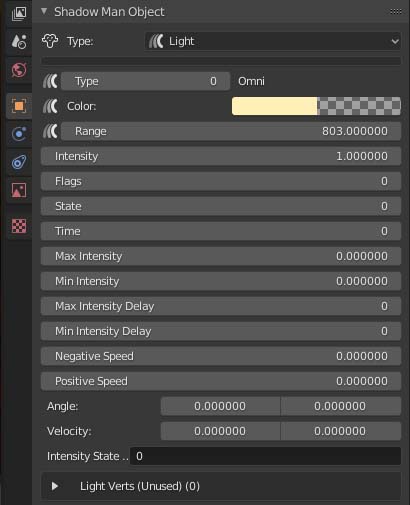
When you select lights you will see a colored wire frame sphere around the light indicated it's range of influence. Hover over properties to see tooltips.

  • Type:
    • 0. Omni: Standard Light
    • 1. Spot: Unused. Don't use
    • 2. Pulse: Slowly fades in and out. Use the Negative and Positive Speed fields.
    • 3. Toggle: Toggles light on and off.
    • 4. Flicker: Changes the light intensity randomly.
    • 5. String: Changes the light intensity based on number values from the Intensity State String field.
    • 6. Spot Per Pixel
    • 7. Omni Per Pixel
  • Color: The color of the light. The alpha color is unused.
  • Range: The distance from this light that vertices will be influenced.
  • Intensity: Power of the light
  • Flags: Pretty much unused. Keep this set to 0.
  • State: Starting state
  • Time: Starting time
  • Max Intensity: Max Power of the light
  • Min Intensity: Min Power of the light
  • Max Intensity Delay: Time (In Ticks) after reaching max intensity that the intensity can change.
  • Min Intensity Delay: Time (In Ticks) after reaching min intensity that the intensity can change.
  • Negative Speed: The fade out speed of the Pulse light.
  • Positive Speed: The fade in speed of the Pulse light.
  • Angle: For Spot Per Pixel light. Rotation of light object. Important that you change these angle values instead of using Blenders Rotation.
  • Velocity: Movement velocity. Unused.
  • Intensity State String: Use with the String light type. This field should only contain number characters from 0 to 9. Each number represents the intensity scalar for the lights state. Ex. '95' - The first number is for state 0. 9 is an intensity scalar of 1.0. the next number 5 is for the state 1 and has an intensity scalar of about 0.5. It will constantly loop through the number values.
  • Light Verts (Unused): Only here for viewing. Do not change.

Detect Boxes

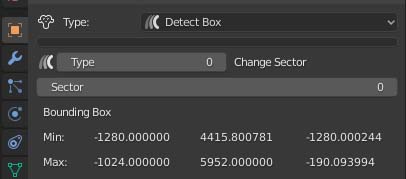
These are volumes that when the Player or Camera enters them will effect the game or player in some way. Edit the box volumes in blender in edit mode or positioning/scaling in object mode.

  • Type:
    • 0. Change Sector: Use this to transition from one sector to another. Use the Sector field to indicate what sector to go to. Never have any overlapping Change Sector detect boxes.
    • 1. Load Sector: Unused. Don't use.
    • 2. Water: When the players position enters the box they will enter water. About knee height the player will begin to wade, above body height the player will begin to swim.
    • 3. Level: Unused. Don't use.
    • 4. Undefined: Unused. Don't use.
    • 5. Join Geometry: All actors that are inside this box will be updated even though they are not in the current sector. The player must also be in this box for those actors to show. This detect box is extended by 512 units in game. Use the Sector field to indicate for what sector actors will be updated from.
    • 6. Lava: Same as Water except will kill the player without the lava swim gad.

Path Nodes

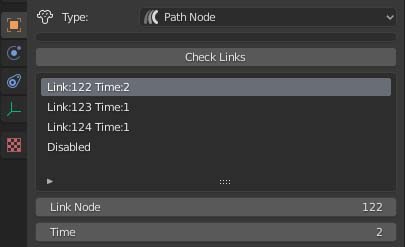
Select a Path Node to see colored lines that this path node is linked to. Select 1 of the 4 links in the list to edit the node and time properties for that link.

  • Link: The NodeID that this link connects to. Set to -1 to disable the link.
  • Time: Unused

Sounds

When you select a Sound object you will see a wire frame sphere around it indicating it's range of influence. Note: There are other ways to add sounds to the environment such as adding the actor RSC_LOOPING_SAMPLE

Looping Sample Pos

  • File: The local path to the audio file to play.
  • Range: The distance to the camera that the sound volume will play at.

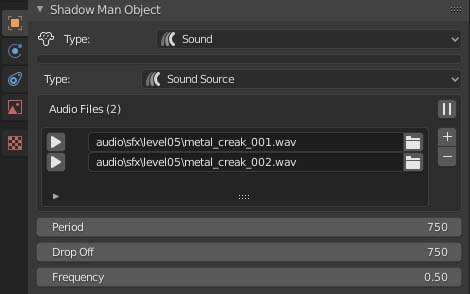
Sound Source

  • Audio Files: The list of paths to audio files that the sound will play at random.
  • Period: The time (in ticks) that the sound source will be updated
  • Drop Off: The distance to the camera that the sound volume will play at.
  • Frequency: if a random float from 0..1 is <= to this value then will update the sound source

Events

These are volumes that when the Player enters them will trigger event links from this event to it's target actors. Edit the box volumes in blender in edit mode or positioning/scaling in object mode.

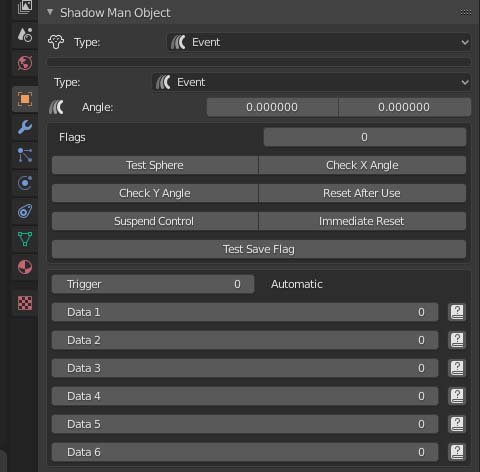
  • Type:
    • Event: When triggered will trigger the Event links connected to this event. Event links must be of type Event or the event link will not trigger.
    • Enemy: The same as Event except the event links connected to this event must be of type Enemy or the event links will not trigger.
    • Sound: When triggered will play Music.
    • Cutscene: When triggered will play a cutscene.
  • Angle: Rotation of event object. Important that you change these angle values instead of using Blenders Rotation. Recommended to always leave 0.0, 0.0 and just edit the box visually.
  • Flags:
    • Test Sphere: Checks if the players position is inside the events sphere bounds, else checks the events bounding box
    • Check X Angle: Event will trigger if event is facing toward the player at a 40 degree angle on X Axis. (Up/Down)
    • Check Y Angle: Event will trigger if event is facing toward the player at a 40 degree angle on Y Axis. (Left/Right)
    • Reset After Use: Event can be retriggered.
    • Suspend Control: Prevents player control. Is only triggered if the Event Link has an action of 13: Camera Cut Away.
    • Immediate Reset: Resets the events state to waiting(if Reset After Use) or dead(if not Reset After Use), on level load.
    • Test Save Flag: Checks if a save flag is set or not.
  • Trigger: The condition in which to trigger this event.
    • Automatic: Event will trigger with no special conditions.
    • Item In Hand: Event will trigger if player is holding in left or right hand the item (specified by Data 1)
    • Item Used: Event will trigger if player is holding in left or right hand the item (specified by Data 1) and is in the process of using that item.
    • Action Pressed: Event will trigger if player presses the action button.
    • Dangling: Event will trigger if player is dangling from a rope

The following 6 Data fields will be specific to the event type. Click the ? Book Icon for help about the fields.