Turok 3 EX Tools v1.2.3 Documentation
By BehemothProgrammer

Installation

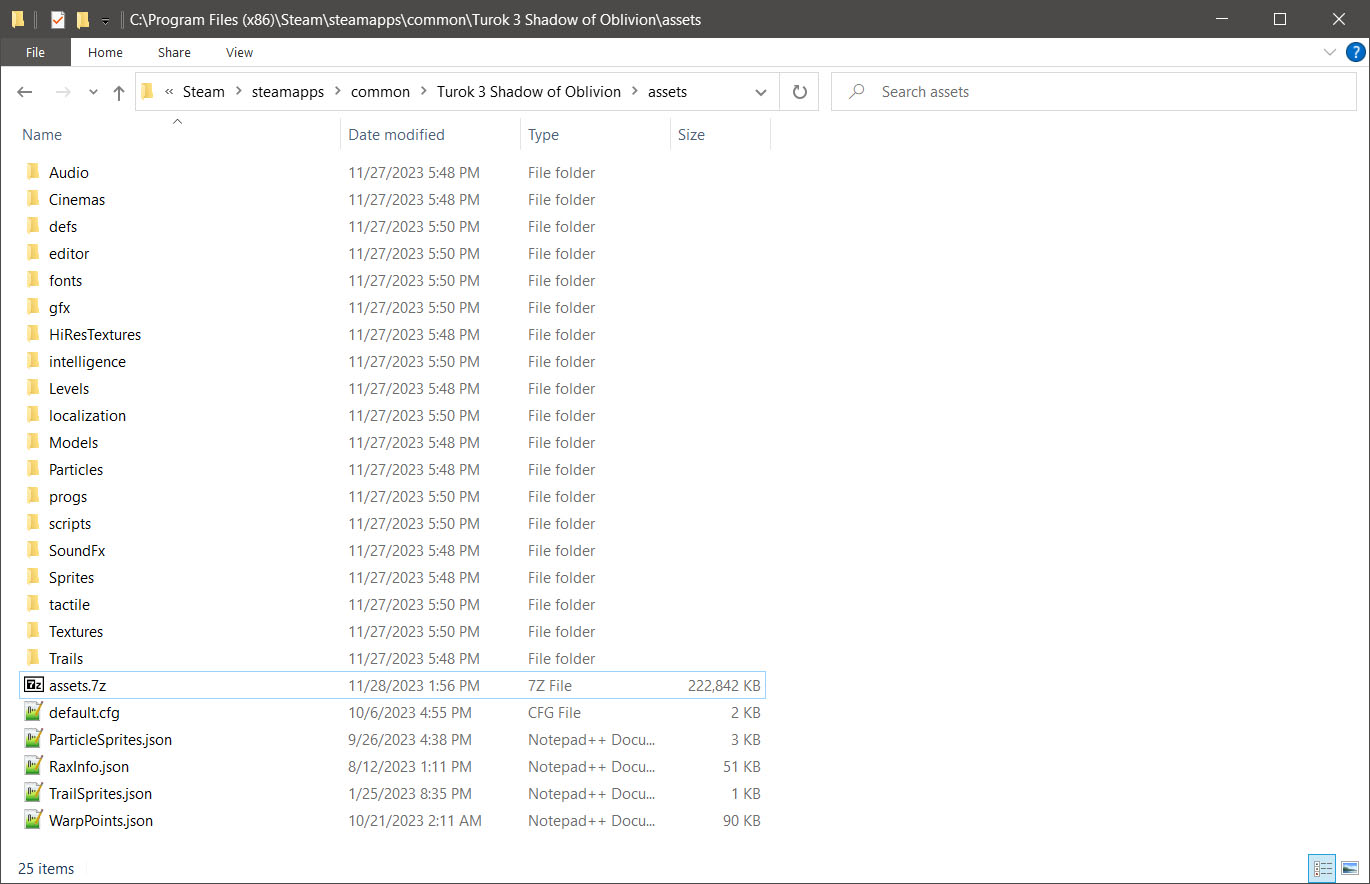
Extract the games assets from the "assets_1.1.2381.1623.7z" file
- Navigate to your Turok 3 install folder.
- Open the folder named "assets".
- Extract the assets from the "assets_1.1.2381.1623.7z" file using 7zip or any other software that can unzip a .7z file.
|

|
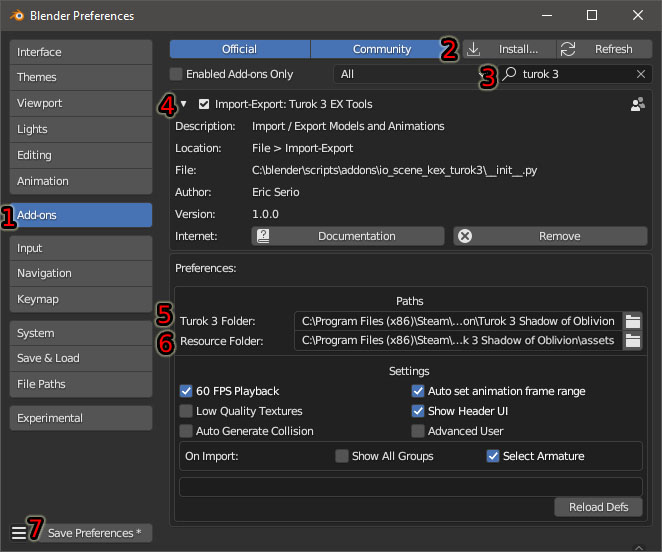
Open Blender and navigate to Edit > Preferences
- Click on the Add-ons tab.
- Click the Install... button and select the Turok3EXBlenderTools.zip file you downloaded.
- If you don't see the Add-on afterwards type in the search field “Turok 3” to quickly find the add-on Import-Export: Turok 3 EX Tools.
- Enable the add-on by clicking the checkbox and expand the field to see that there are 2 folder paths you must set before using this add-on.
- The Turok 3 Folder field must be assigned to the Turok 3 install folder
- The Resource Folder field must be assigned to the folder where you extracted the contents of the assets.7z file. If you haven't done that yet then do that now.
- Click the Save Preferences button
|

|
Importing

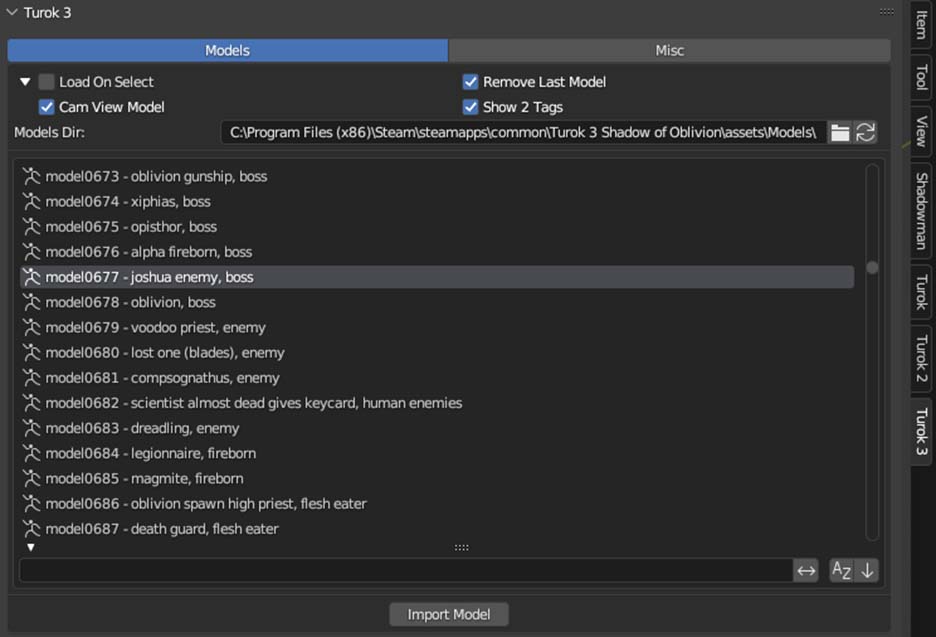
- To import models open the tools window by clicking on the arrow in the top right of the 3DView or by pressing N by default to open the tools window.
- In the View tab it's best to set the Clip Start Distance to 1.0 and Clip End Distance to 100000.0
- Click on the Turok 3 tab and select the models tab at the top. Set the Models Dir to the Models folder inside your assets folder to see a list of all the models.
- Click on any model name in the list to import it.
- Don't forget Blender has a search bar at the bottom of UI lists. Use it to search for models by name.
|

|
Exporting

Staticmeshes and Skinnedmeshes
- Navigate to File > Export > Turok 3 (.staticmesh, .skinnedmesh)
- If an error message pops up then check the console to see all the error messages and correct them before you can export.
- If there was no errors then the Blender export file dialog window will appear. Export the model to your desired path.
|
Modding Docs/Tools

General modding details.txt
convert_textures.py (A python tool to easily handle converting textures)
How to use: Create a "tools" folder in your Turok 3 Folder and put this script in there. Download ImageMagick from the link in the description of this file. Make a "textures_src" folder in your Turok 3 folder and place all your custom textures in there. Run this .py script and it will handle converting/copying/removing everything in your "textures" and "HiResTextures" folders automatically.
Scripting API.txt
How to setup Codelite for scripting.pdf


